


Zero frets have an awesome property: they allow open strings to sound as close to fretted strings as possible. In addition, there is no guess work in cutting nut slots, etc. All in all, they just make perfect sense. When it comes to .strandberg* guitars, the 0-fret serves a secondary purpose as well: namely that it provides string ground for the remaining strings after only the high E has been grounded. One drawback, however, is that it can wear out over time since the string is always resting against it. The more the string can move across it during play, the quicker it will wear out. The original design intent for the EGS hardware was to simply fasten the strings in the string locks and let them pass over the 0-fret, but with fanned fret deployments, the string locks don’t line up at the correct spacing. So to provide this, and also to minimize the possible movement, a correctly cut “nut”, or “spacer”, is needed.
Now that we have guitars in serial production, it is no longer feasible to hand-cut nuts, as we have always done. We need an outside vendor to produce them in quantities and at a decent price. But the vendors out there are not used to cutting nuts for fanned fret guitars, and it is indeed tricky to do with conventional techniques. The obvious solution is to injection mould nuts. But this requires creating a mould, and unless you make nuts in quantities of 1,000+, the nuts become very expensive. And if a re-design is called for, facing a new mould investment can be a strong deterrent.
So a few weeks ago, I hatched the obvious idea to 3D-print nuts! The intent was to model a perfect nut with rounded corners, surfaces with the correct release angles, etc., to replace the 0-fret as well.
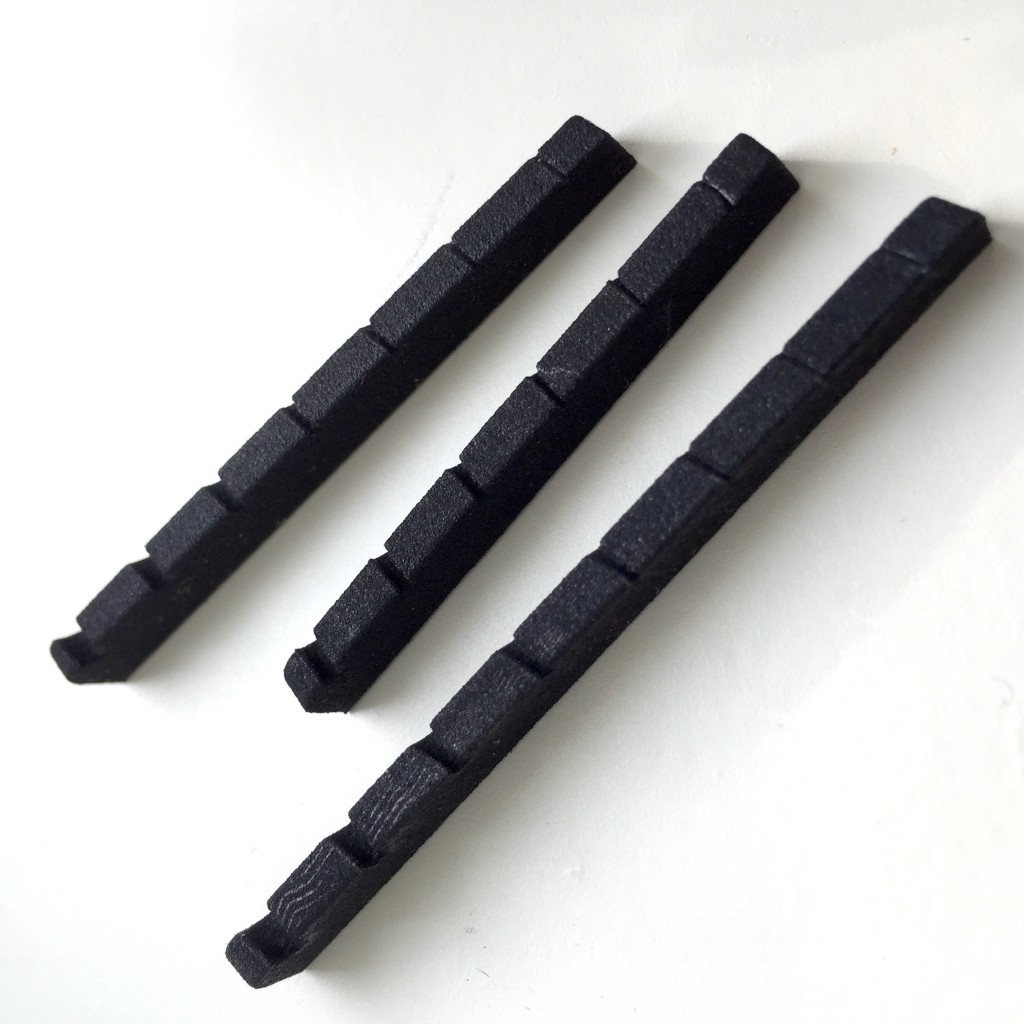
The prototypes came out good enough, but unfortunately, the plastic used just isn’t hard enough. The sound of the open string was not at all as good as one would want. So we’re back to the drawing board – the plan is to continue to use a 0-fret in combination with a 3D-printed spacer, which will give us the best of two worlds.

AND: as a an added fun benefit, you will be able to order your own nuts in a large variety of colors and materials!
Well, if it works. The second round of prototypes have been ordered.
if there is an advantage in making 3d printed nuts as in “accuracy” then they would be fine for patterns, it so easy to make a nut if you have a pattern however making one from scratch is NOT easy, it takes time and a lot of measuring and if you don’t get it right you may have to start again, a string too low is never an option nor is a string too high, there is only perfect, so if you are able to dimension perfect nuts then that’s GREAT as they can be use for patterns lickity split a nice bone or horn nut, even brass you can make the molds with those 3D’s, its so easy and inexpensive to melt metals to day with the DIY electrical kits, so easy to make a mold as well, all you need then is a small grinder with brush and polishing wheel…
Actually, it turned out that the precision/tolerance was far from good enough, so I had to ditch this entire idea. Having said that, having a few rounds of samples made was incredibly useful to debug the design prior to making the moulds.