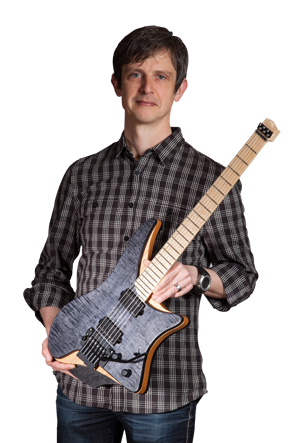


Today, drilled the fastening holes for the neck and could for the first time test out the balance of the instrument. It was a nervous moment the first time I put it in my lap, since the body is so incredibly light and the hardware and pickups add very little weight. The neck on the other hand, being made out of wenge and ebony, felt like a rock in comparison. However, I needed not to have worried. I’m happy to report that it balances perfectly and exactly according to plan. I started with an alignment test setup that was left sitting all the while I was drilling the holes. Then, the three main positions were tested: Look ma, no hands! Lastly, note the angle of my index finger and how it follows the angle of the frets. The guitar obviously doesn’t balance itself in this position, but it is very comfortable nonetheless. I can feel that the comparatively heavy neck and the trapezoidal neck profile (contact Rick Toone for more information on this neck profile) seems to address the “headless wiggle” problem. I can’t wait to string it up, but the mounting plate for the string locks is off for finishing along with the rest of the new...
Learn MoreI feel that some additional explanation on the string lock is in order. First, the design goals for all hardware that I develop are (not necessarily in order of importance): Modular, i.e. ability to build with any number of strings and use compound scale lengths Low weight – for ergonomics, but also for efficient energy transfer into the tone wood Easy to use Easy to manufacture, including minimizing the number of parts that need to be manufactured especially Durability A minimum of energy transfer points, i.e. strive for direct contact with the wood Aesthetically pleasing Not all goals can be met in every design of course, but they are at least goals. In this design, the modularity is apparent. In addition to being able to use it with any number of strings, you may also choose whatever string spacing is suitable. Low weight comes from using extremely hard and durable 7075 aluminum. Ease of use is not optimal – I would prefer a solution that did not require a tool. Nevertheless, allen keys are part of most guitarists’ arsenal and widely accepted. This design is not the easiest to manufacture, but with the right machinery it can be done with no more manual operations than any at the face...
Learn MoreBack in March last year (!), Mats over at eLutherie.org raised the question of where to place the output jack in the EGS design. Since then, I have been so focused on hardware that I have not really thought about it. That is until I was contacted recently by someone who wanted to pioneer actually building the first instance of it. One of the questions that was raised immediately was the one with the output jack. I played around with it a little bit, and have come up with two alternate placements that will both work well. Placement 1 is at an angle in the cutaway for the tuners, similar to that of an Ibanez JEM. This could, however, theoretically obstruct the tuners. It could also interfere with placing the guitar in a stand or on a surface. But it gets the cable out of the player’s way. The second position is at an angle at the back of the body, and I think this is my favorite. It works well both seated and standing up, in the anticipated playing positions as described in an earlier...
Learn MoreNext steps are adjusting approximate string height and mounting the bridge. First, I unwind the tuners to their maximum range. Next, I thread the string through the tuner. And fasten it in the string lock. All six strings mounted. All six strings fastened. The result is stunning! I have been very impatient to get some of this work done, as may be apparent from some of the woodwork, but it’s done and it works amazingly well. Next installment will cover adapting a pick guard and finishing the guitar. I am not yet sure whether to mount the Lace Alumitones that I have laying around or if I should go more...
Learn MoreAfter completing the routing of the body, it is time to turn to the neck. I have decided to keep the original neck with a minimum of modifications. Note that it is possible to mount my string locks in many different ways, including removing most of the head. I begin by drilling 1.5 mm holes through the side of the head and through the bottom of the tuner holes. I then enlarge the top portion of the holes to 6 mm. Now, I can insert the string locks through the tuner holes. I insert the fastening screws through the side holes and tighten. These hardened screw heads will form the seat that the strings will rest against when locked. This provides good durability and they may also be exchanged if they ever get worn. This is what it looks like from above. Here, I have mounted all six string locks. Viewed from the side, you can see the locking screws. Next installment will cover assembly of the complete...
Learn MoreI decided to route a slanted “groove” in the body to allow for the fingers to reach underneath the tuner knobs. I made it approximately 30 mm wide and 10 mm deep. A tremolo fitted for reference. Next installment will cover modifying the neck to fit the string...
Learn More